Repairing Corrosion: How to Fix a Damaged Car Body Panel
Repairing Corrosion: How to Fix a Damaged Car Body Panel
Corrosion on a car body is an issue that can significantly decrease the vehicle's value, as well as affect its appearance and safety. Repairing corrosion requires care and precision to ensure a lasting result. In this article, we will detail the process of repairing a car body panel damaged by corrosion, considering the latest techniques and materials available on the market.
Preparing Tools and Materials
Before starting the repair, you need to gather the appropriate tools and materials:
- Angle grinder with a metal cutting disc: To remove rusted sections.
- Sandpaper of various grades (from 80 to 400): For smoothing the surface.
- Anti-corrosion agent: To protect the cleaned metal.
- Epoxy primer: Ensures good adhesion for the paint and provides additional protection.
- Topcoat paint in the appropriate colour: For finishing the surface.
- Spray gun or aerosol: For applying primer and paint.
- Protective mask, gloves, and goggles: For safety during the work.
- Masking tape and protective film: To shield undamaged parts of the car.
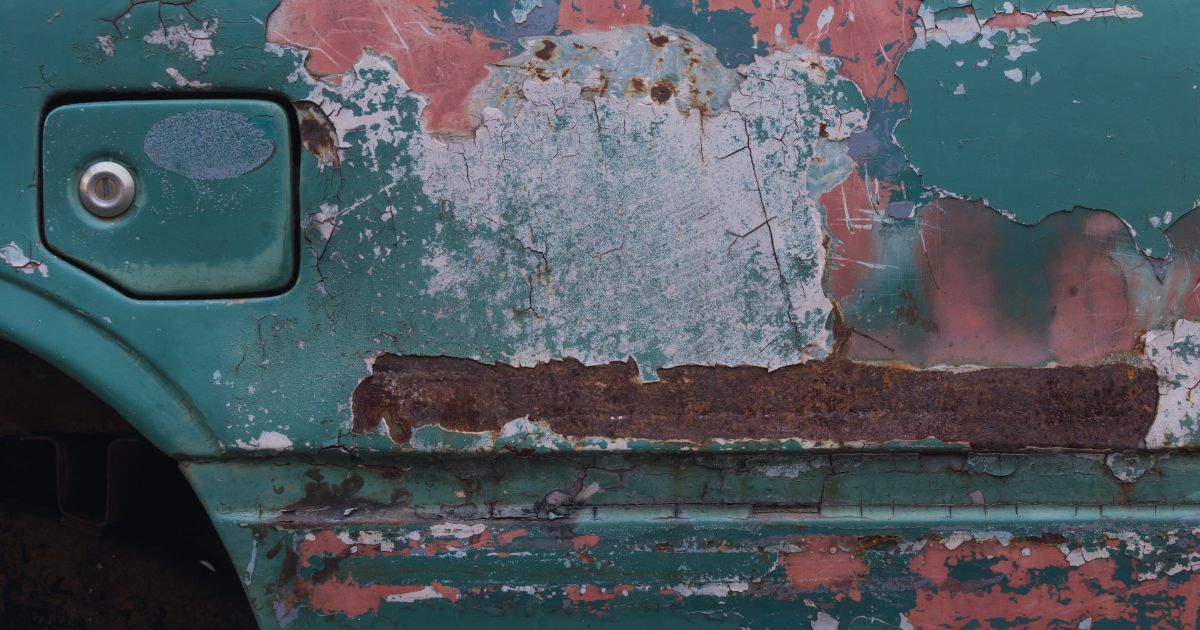
Step 1: Assessing the Degree of Corrosion
Before beginning any work, thoroughly examine the damaged area. Assess how deep the corrosion has penetrated and whether the damage is only superficial or has gone deeper into the metal structure. In the case of severe corrosion that compromises the structural integrity of the body, it may be necessary to replace the entire component.
Step 2: Removing the Rusted Area
Once you have assessed the extent of the damage, you can start removing the rusted layer of metal. Use the angle grinder to grind away the rust down to healthy metal. Ensure that you thoroughly clean the entire rusted surface, as leaving even small fragments of rust can lead to its quick return.
Step 3: Surface Preparation
After removing the rust, the surface should be smoothed with sandpaper of various grades, starting with coarser grades (e.g., 80) and gradually moving to finer grades (e.g., 400). The goal is to achieve a smooth and even surface on which protective and paint layers can be applied.
Step 4: Applying Anti-Corrosion Agent
The next step is to apply an anti-corrosion agent to protect the metal from rusting again. The agent should be applied according to the manufacturer's instructions, typically using a brush or spray. It is crucial that the agent covers the entire surface exposed to corrosion.
Step 5: Applying Epoxy Primer
After the anti-corrosion agent dries, apply an epoxy primer to the surface. This primer provides good adhesion for the topcoat paint and additional protection against corrosion. Apply the primer using a spray gun or aerosol, ensuring even coverage of the entire area.
Step 6: Painting
Once the epoxy primer has dried, you can proceed to painting. Thoroughly mix the topcoat paint and apply it in several thin layers. Each layer should be dry before applying the next one. Use a spray gun, maintaining the appropriate distance and movements to avoid drips and unevenness.
Step 7: Finishing
After applying the final layer of paint, the surface can be smoothed with very fine-grade sandpaper (e.g., 2000) and polished to achieve a shine and uniformity. Final polishing can be done using a polishing compound and a soft cloth or mechanical polisher.
Step 8: Protection and Maintenance
To prevent future corrosion, it is important to regularly wash and maintain the car body. It is advisable to use protective waxes and regularly check the condition of the paintwork to quickly address any emerging damage.
Detailed Description of Each Step
Assessing the Degree of Corrosion
Thoroughly examining the damaged area is crucial for effective repair. Corrosion can appear in various forms, from surface rust to deep, structural metal damage. Surface rust typically manifests as a thin, brown layer on the metal surface and is relatively easy to remove. Deeper corrosion can cause cracks and perforations in the metal, requiring more advanced repair techniques, such as welding or replacing the damaged part.
Removing the Rusted Area
The angle grinder with a metal cutting disc is the most commonly used tool for rust removal. When using it, be careful not to damage the healthy metal. The grinding process should be done gradually, with even pressure to avoid overheating the metal, which could lead to further damage. For smaller rust areas, sandpaper or wire brushes can be used for manual rust removal.
Surface Preparation
After rust removal, the metal surface often remains rough and irregular. Surface preparation using sandpaper of various grades is essential to achieve a smooth and even surface. The sandpaper grades should be selected according to the metal's roughness: start with coarser grades (e.g., 80) to quickly remove rust residues and level out irregularities, and finish with finer grades (e.g., 400) to get a smooth surface ready for the next steps.
Applying Anti-Corrosion Agent
Anti-corrosion agents come in various forms, including liquids, aerosols, and pastes. The choice of agent depends on the type of metal and the conditions in which it will be used. The most commonly used anti-corrosion agents contain zinc phosphate, which reacts with the metal to form a durable protective coating. The application of the anti-corrosion agent should be even and cover the entire cleaned surface to provide full protection against corrosion.
Applying Epoxy Primer
Epoxy primer is a crucial element in the car body repair process. Its main function is to ensure good adhesion for the topcoat paint and provide additional protection against corrosion. The primer should be applied in several thin layers, allowing drying time between each layer. Epoxy primer is highly resistant to mechanical and chemical damage, making it an ideal choice for car body repairs.
Painting
Painting is one of the most important steps in the repair process, as it directly affects the final appearance of the car. The topcoat paint should be applied in controlled conditions to avoid contaminants and application errors. The paint is applied in several thin layers to ensure even coverage and deep colour. It is also important to allow sufficient drying time between each layer to achieve a smooth and durable finish.
Finishing
After painting, the finishing process involves smoothing and polishing the surface. Smoothing with very fine-grade sandpaper (e.g., 2000) removes minor imperfections and achieves a perfectly smooth surface. Polishing with a polishing compound adds shine and uniformity, significantly improving the appearance of the repaired area.
Protection and Maintenance
Regular maintenance of the car body is key to preventing future damage. Washing the car removes contaminants that can accelerate the corrosion process, and applying protective waxes creates an additional protective barrier. Regular inspections of the paintwork allow for the quick detection and repair of minor damage before it becomes a serious problem.
Using Modern Technologies
In recent years, modern technologies have been increasingly used in car body repairs, enhancing the effectiveness and durability of repairs. These technologies include:
- Hybrid repair systems: Combining traditional repair methods with modern composite materials.
- Smart Repair techniques: Allowing quick and cost-effective removal of minor damage without repainting entire panels.
- Laser technologies: Used for precise rust removal and surface preparation for painting.
Conclusion
Repairing corrosion on a car body is a process that requires precision, appropriate tools and materials, and knowledge of modern techniques. Following these steps allows for the effective removal of rust, protection of the metal, and restoration of the vehicle's aesthetics. Regular maintenance and protection of the body ensure long-lasting protection against corrosion and preserve the car's value.